Step by step Installation of SQL SERVER 2008 & 2012, Tutorial with the help of pictures and screen shots:
- Insert the DVD and Run SETUP.EXE to start the setup of SQL SERVER 2008 & 2012.
- When the Setup launch choose Installation tab (top from the right).
- In most of the cases you have to select the New SQL Server stand-alone installation or add features an existing installation, if you have already installed the previous version of SQL Server, then you have an option to Update.
- . Setup will check the files if needed installed the required Setup Support Files. Click OK when complete.
- . Click Next on the Product Key page.
- On the License Terms Page, Select the check box “I accept the license terms” and click Next.

- Setup will check again and if needed install setup support files. Click Next when complete.
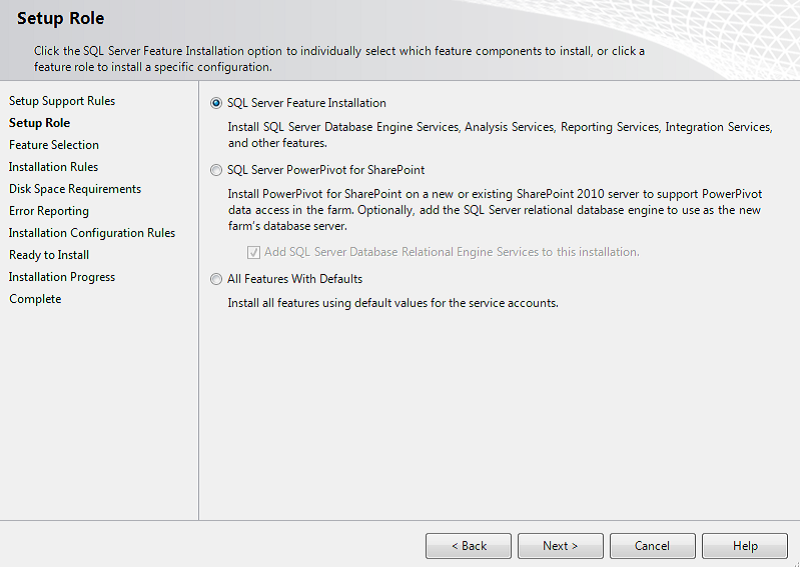
- Setup
Role: Select SQl Sever Features Installation and click Next.
- Feature
Selection:
- Select the component of SQL Server to install on your computer.

- Click On the Select ALL button and then click Next.
- Installer will verify Installation rules when it completes click Next.

- Instance Configuration:
- Click on Default Instance.
- Choose the installation path for SQL Server and then click on Next.

- Review the Disk Space Requirement and Click Next When Prompted.

- Under Server Configuration set Configuration set both SQL Server Agent, Analysis Services (if installed) and SQL Server Database Engine to Manual (unless you want it to run all the time with your system which will use up a lot of system recourses when you are not using the Sql Server). These are services that run components of SQL Server.

The image
above are the defaults, we suggest that you set Account Name to NT
AUTHORITY\LOCAL SERVICE
- Check the collation tab at the top. For our purposes this can be left at default SQL_Latin1_General_CP1_CI_AS which is Latin1-General case insensitive. This drives how SQL server recognizes commands, for example you can choose a different language or set it to be case sensitive. Some applications require for you to choose a specific collation. You can click Customize to change it. Click Next when done.

- Database Engine Configuration:
- Choose the authentication mode for the system. Windows authentication will use your windows account privileges to connect to SQL Server. We highly recommend using Mixed Mode so that there is an additional built in SA account with a separate user name and password as well as your built in windows account.
- Make sure to ADD User you can ADD user by click on ADD Current User.
· You can leave Data Directories to defaults. Data
Directories can be changed if you have a multiple disk environment and for
performance want to separate out where different parts of the DBMS go. For
example, in production environments the LOG components should go on a separate
disk array, which will improve performance of the system.

·
If you are installing SQL Server you might want to
enable FILESTREAM.

- Analysis Services Configuration:
If you have selected Analysis Services component you
will be presented with the following screen.
·
Select the
Multidimensional and Data Mining Mode
·
Click Add Current
User
·
Click Next

- Error Reporting, Installation Configuration Rules,
& Ready to Install
- Click Next through the next two screens It is up to you to select Error and Usage Reporting, click next.


·
Review selected features and click Install,
Installation will begin, this will take some time.
·
This will take some time:

Enjoy
using SQL Server 2008.
Hit the Facebook like button below if you like this article... this helps a lot and keep us motivated :)
Hit the Facebook like button below if you like this article... this helps a lot and keep us motivated :)
No comments:
Post a Comment